Cookie Jar Photography
April 22, 2012I didn't have time this last three weekends to take or process more photographs of flies. I did take a couple of shots today of my photography setup, though.
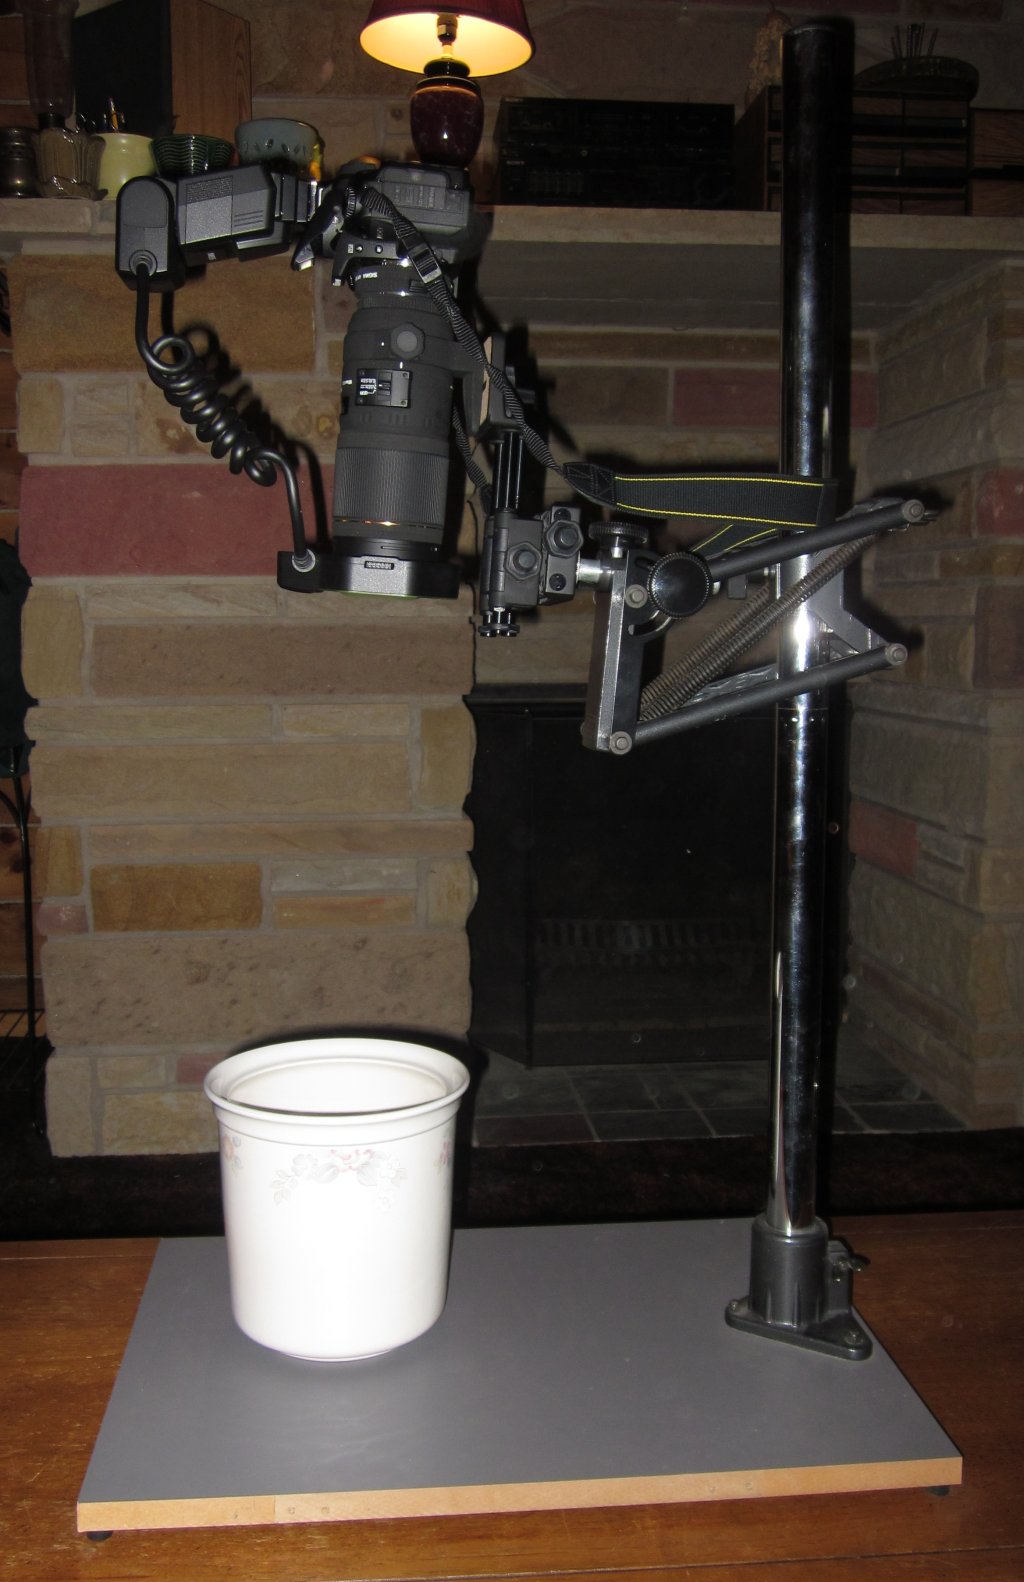

The shot just to the right shows the camera mounted on the copy stand from the side. I took the lights off the copy stand. They weren't necessary, and got in the way when I needed to move it. The camera is a Nikon D90, the lens is a Sigma 180 mm macro with a 2x adapter, and the flash is a Sigma ring unit (EM-140DG). Everything is mounted on a stacking rail. I've taken all the recent habitus shots using this setup, with the camera in manual mode, at ASA-200, F-32, and 1/50th second. I don't think the timing is critical; without the flash it's dark in the cookie jar; so the shutter just has to be open for longer than the flash. I set it to 1/30th second for the head profile shots. One thing that is very noticeable from this view, is that the camera and lens are not exactly vertical: they're tilted slightly backwards. To compensate for this I pin the fly at a slight angle as well.
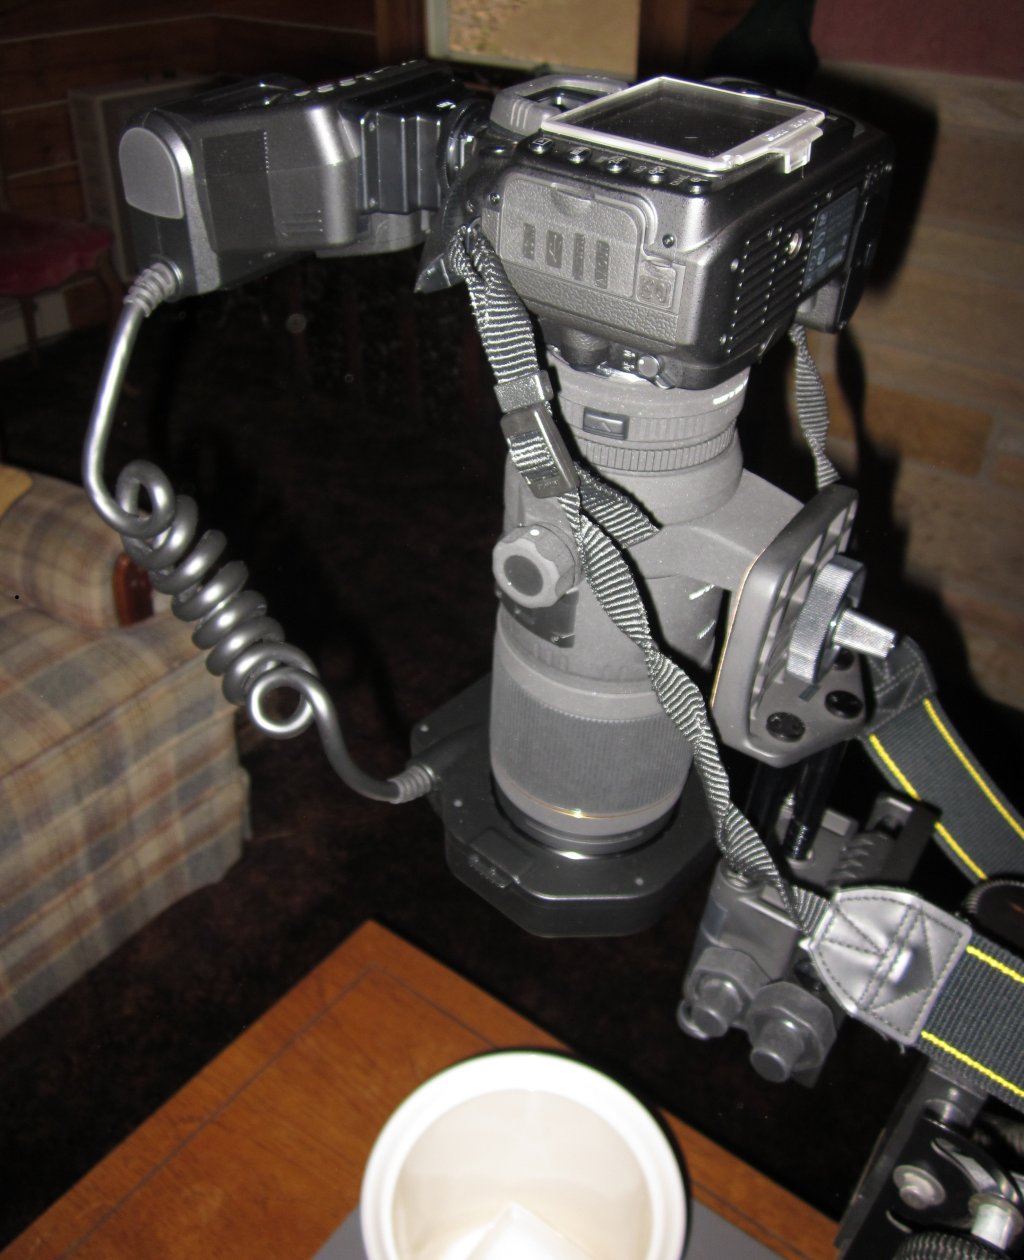
The next photo, just under the first, shows the same rig from an angle, and is slightly enlarged compared to the first. You'll note that I'm not using a remote flash; I just set the timer and then press the button. My cabin is extremely sturdy, but even so I need to be careful not to move, as with photo stacking any vibration will result in more work for the software. BTW, it's the stacking rail that you adjust incrementally between shots, not the lens focus. Otherwise, the position of the specimen would shift in the field of view.
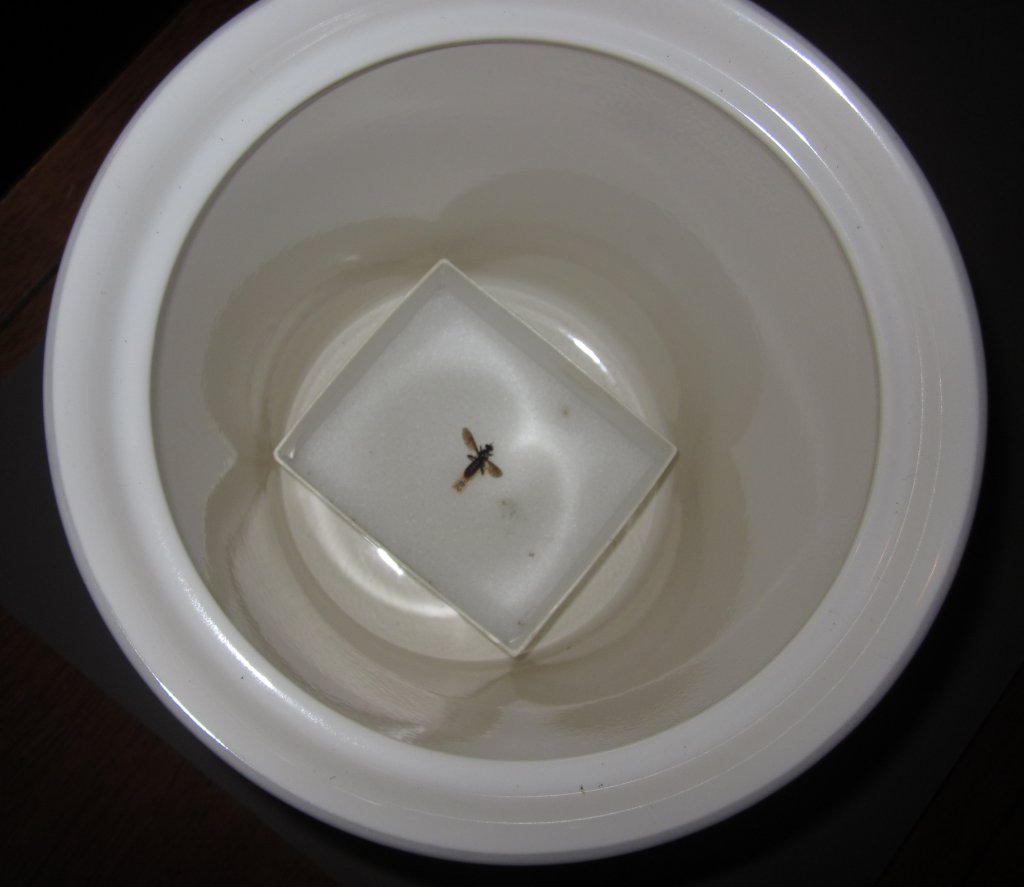
In the third photo, I've shown the pinning tray in the cookie jar. The cookie jar does exactly what I need, that is, it diffuses the flash. But the pinning tray might be improved on. Other people seem to be pinning the insects they are photographing on the outside of an inverted styrofoam cup, and shooting them from the side, rather than from the top. Apparently the curved sides of the cup result in less shadow. This in turn should result in less work with the GIMP. I'm considering either using the bottom of the cookie jar itself as a backdrop or maybe a section of a styrofoam cup placed in the bottom of the jar.
The last photo is of an adjustable pinning stand I use for the head shots. I find one of these type stands indispensable for looking at pinned flies under a dissecting scope, and they work well here for positioning the heads for profile shots. I got the one in the picture about 25 years ago; I think that model has been discontinued, but you can purchase one almost like it here; I bought one of those too, and I consider it well worth the money. When shooting heads I place the stand directly on the bottom of the cookie jar.
I polished up the CSS to render the blog in a style people hopefully will find more pleasing. It works exactly as intended in the latest versions of Opera and Chrome, although it looks blocky and is slightly misaligned in 64-bit Internet Explorer 9. I don't recommend using the latter.
You'll notice that if you click on one of the pictures above, it results in a pop-up containing a larger version. This is because I implemented the use of jQuery and one of it's extensions, FancyBox. I also used FancyBox to redo the photo presentation for my April 2 post. The pop-up automatically fits itself into the window space you have available, up to the size of the linked photo. I plan to use these pop-ups mainly in the blog; they're perfect for letting you view something without unduly interrupting the flow of text. I like my current method for the full-screen habitus and other photos in the main pages.
When I first redid the blog style I thought it worked OK at 800x600 resolution; in fact, keeping it so that it worked at that resolution was one of my main goals. But now that I'm home where I've got an old computer I see that the pages don't fit. I'll probably change the pages to use percentage widths sometime in the next couple weeks, so that they will display correctly at lower screen resolutions. For the present, though, the minimum working resolution for the blog is 1024x768.
I spent considerable time during the last three weeks reworking the HTML pages for Choerades and the two new genera, to incorporate both all the information that's now present in the Microsoft Word 7 versions, as well as the photos I plan to be taking. That won't be posted until after I've decided how and where to publish in the traditional way, or even if I'm going to publish at all. And I still have a lot to do to incorporate everything I'd like to into the HTML versions. At some point, too, I've still got to convert all the main pages to CSS 3 and HTML 5, and since I'm learning as I go just this reformatting may take a while.
I also added a reference to the Bibliography; namely, Champlain and Knull (1923). This was courtesy of Rick Westcott. I had a copy of this paper and had read it about 30 years back. But meanwhile I had forgotten it existed. The title is Notes on Pennsylvania Diptera. There are references to two asilids, both Laphriines--Dasyllis grossa (now Laphria grossa) and Nusa fulvicauda (now Andrenosoma fulvicauda). Laphria grossa is recorded as killing and eating a cicada.
On another subject, Sam Droege posted this link on the ENTOMO-L list server. It connects to a powerpoint presentation by German Perilla on SlideShare, describing how to convert an LED flashlight into the equivalent of a fiber optic light, for use with a dissecting microscope. He is hoping amateurs will use it to help better identify native bees. It should also work admirably for illuminating robber flies, including those covered here. I don't need something like this, as I have a dual gooseneck fiber optic setup that I got at Lehman Scientific for about $350 total, including tax. For what you get, that figure seems extremely reasonable to me. The homemade rig requires you already have several types of power tool and the ability to use them, and runs about $100 for parts.
 Digg
Digg
 Facebook
 StumbleUpon
 LinkedIn
 Twitter
 Email
Email